How to Add a Faux Rolled Strap to Your Bag
Recently Patricia made The Cici Tote Bag as a gift for a friend and decided to change up a couple of things on the pattern:
- she used all vinyl
- she reduced the pattern to 90%
- she substituted faux rolled handles for the straps
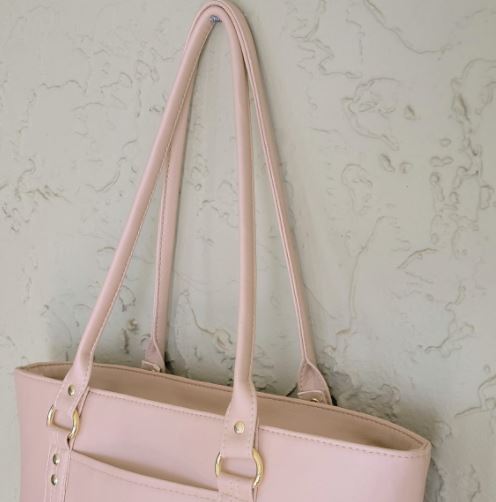
That bag has gotten loads of attention - and questions about those handles. Using the instructions from our Colette Bowler Bag (and some pictures from our testers' makes), I'm going to show you how to make those super easy handles to add to your bags.
Abbreviations used:
- RS - Right side(s)
- RST - Right sides together
- WS - Wrong side(s)
- WST - Wrong sides together
- DST - double-sided tape
- SA - seam allowance
Strap Measurements:
Determine the desired finished width of your strap ends based on your hardware width. Multiple that by 2. Patricia used 1" D-rings, so she cut her strap width at 2". She wanted an 11" drop from the shoulder, so she cut her strap at 30". For a longer or shorter drop, add or subtract 2" per inch to your measurement. The length includes a 1 1/2" fold back on each end of the strap.

The Colette Bowler Bag has a 9" drop
Materials Needed:
- You'll want to use a heavy fabric - vinyl, canvas, or decor fabric will give you the best results. Non-fraying fabric such as vinyl, faux leather or leather would be preferable. Webbing could also be used.
- Top-stitching thread and appropriate needle
- DST
- Rivets, if desired
- Edge Kote if desired
- Strap Ends if desired
- A lighter

Make the Strap:
1. Lay your cut out strap piece WS up. Draw a centered line down the length.

2. Fold the long edges WST towards the center line.

3. Fold in half again RST, carefully matching the folded edges and clip in place. Stop 3½” from each short end.

Top-stitch at 1/8" SA along the open edge of the strap. Do not back stitch at the ends. Instead leave a longer tail of thread and pull through to the center of the fold and tie off. The knot will be hidden inside the fold. Trim the thread close to the knot. You can melt the thread ends with a lighter if using nylon or polyester thread but be careful not to burn your material!
Trim the raw edges evenly if needed. Apply Edge-Kote if using.
4. Lay the strap with the back side of the strap ends facing up. Place a small piece of DST about 1/8” from the raw edge. Do not remove the paper.

Connect the Strap to the Rings:
1. Loop the strap over the D-ring from the front side of the bag with the raw end to the back. Remove the paper from the DST and position the end 1 1/2" up the back side. Press together. Apply Strap Ends if using.


Becca Olson used Strap Ends and Chicago Screws for a polished look
2. Stitch across the end to secure the strap. Note: you can stitch a box, add a rivet or two, or only add rivets and no stitching at all.

For setting rivet, no stitching used

The Busy Sewing Room used webbing with a stitched box

Turtle Trax Too used stitching and a rivet to match the strap connector

Cosmic Thread Customs added two rivets, no stitching

Linda Rizarrdi added stitching below the rivet
3. Make sure the strap isn't twisted, and attach to the remaining D-ring on the same side of the bag. Then flip the bag over and do the same with the remaining strap.
And that's it! A faux rolled strap adds classy style in just a few short steps.

The Colette Bowler Bag by Two Leos Design
- - - - - - - - - - -

