Best Tips for Sewing a Curved Gusset on a Handbag
I'm not gonna lie - I was intimidated by my first curved gusset making The Colette Bowler Bag. I had spent a considerable amount of time fussy-cutting my pocket and the overall design of the fabric placement. I actually put the bag aside for a couple of days to mentally prepare myself.
Why so much anxiety?
- I was using my nemesis - vinyl(!)
- A botched job would detract from my careful fabric pattern placement.
- I worried my domestic machine was not up to the challenge.
To be clear, a gusset can be challenging whether it is sewn from vinyl or fabric. But fabric has a little give and will stretch in those curves.
The following tips and techniques come from Patricia and her directions on The Colette Bowler Bag pattern. However, these tips will apply for any area where a straight edge and curved edge meet.
For a great-looking gusset on each side of your bag, check out my tip at the end.


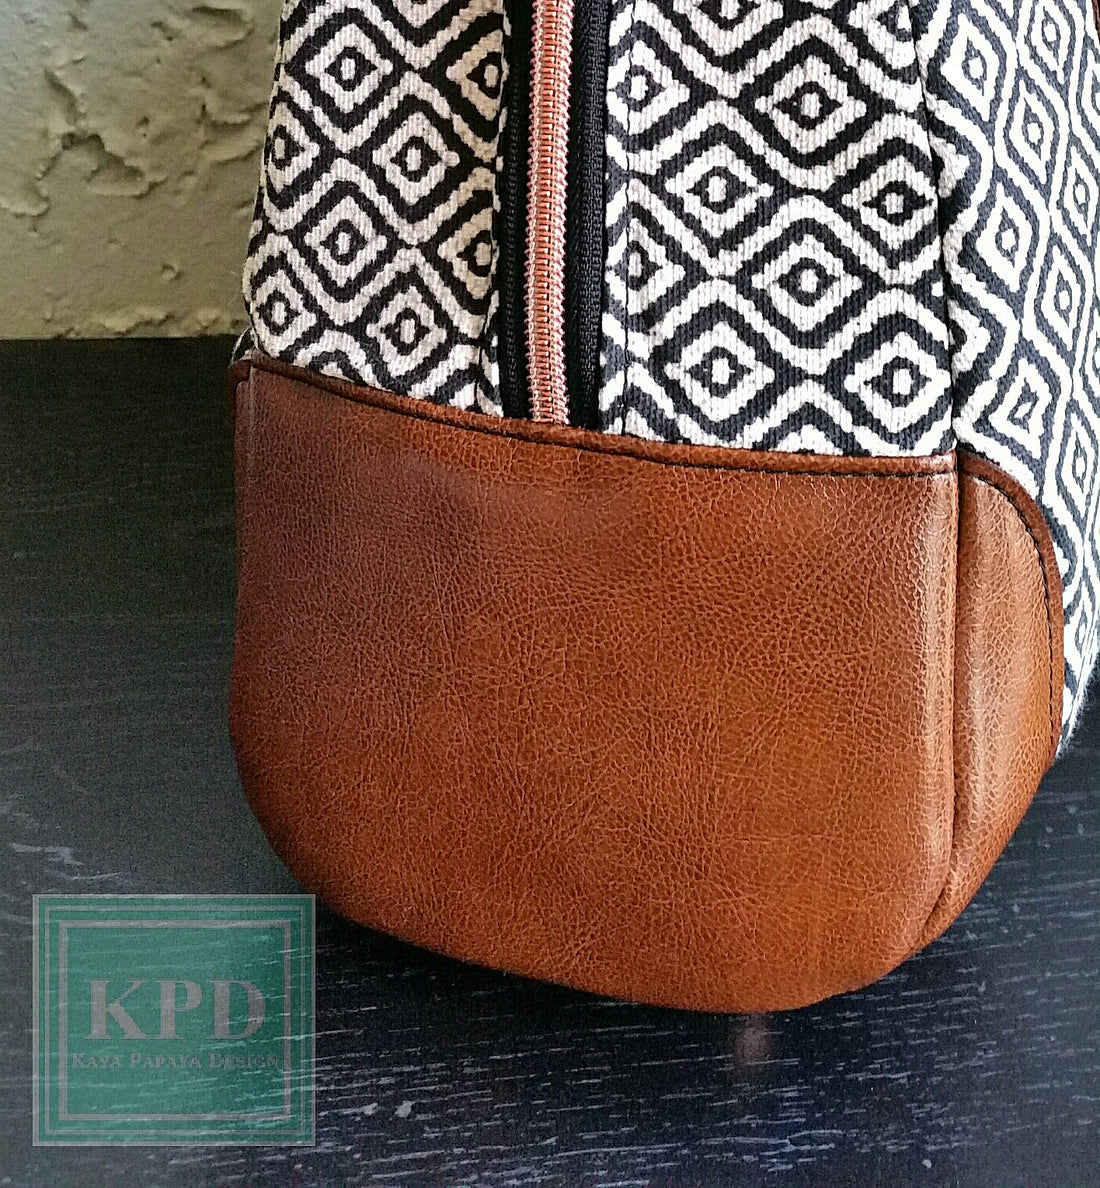
The strived-for finish - The Colette by Patricia Maxey
The Pattern Piece:
This is the gusset pattern piece (not to scale) with curved edges and center markings. The foam interfacing should be centered 1/2" away from the edge, keeping it out of the seam allowance.

TIP: After you have fused your interfacing to the gusset pieces, take the time to mark the 3/8" seam allowance. You'll be able to maneuver the piece and stitch on the marked line.
Ready to attach - verify seams if needed:
In this picture, the gusset piece has been added to the zipper placket, and top-stitched. Personally, I like to verify that my seams on the outside of the bag joining the bottom and placket are 3/8". I don't want to find it out AFTER I've clipped it all together! Adjust seam allowances if needed.


Snip curves to help in easing:
At this point, make small 1/8” snips in the curved part of the exterior gusset every ¼”. Do not clip any deeper!
This will help open the curve to ease the seam allowance against the straight edges.
Clip the gusset to the bottom and sides:
With the added foam and the rigidity of vinyl/faux leather, you will have to "manhandle" the bag in order to get this area to lie flat. With the gusset pieces on top, the pattern instructions are as follows:
"Make sure your lining is clipped out of the way (purple fabric). With RST (right sides together), pull down your exterior GUSSET to match up the center mark with your exterior BOTTOM center mark. Make sure you do this first and pin or clip together.
Second, align the exterior GUSSET seam and the top of the corner OVERLAYS on the sides. If the required SA allowances have been followed throughout the pattern, they should line up on either side. Note: You can use a small regular stapler to hold the pieces together by stapling within the SA. They will be trimmed away after stitching. This helps a lot with curves!"
Use the stapler AWAY from your sewing machine and over the trash can!

TIP: If you choose to use a stapler, the mini handheld is best for control. I attempted using a small desktop stapler and it was too awkward. This is the best size:

Pattern directions continued:
"Continue clipping around the side until you reach the top corners. If you have not used staples, baste in place at 1/8” first, so you can check and adjust if anything shifts. I strongly suggest basting these sections first before stitching the entire seam so they do not shift. After basting, peek inside the bag to verify that your overlay and gusset seams match."


TIP: I found after making multiple test bags, that stitching the bottom curve of the side panel first, and then stitching from the curve to the top corners on the straight sides works well if you don’t have the option to use staples."
"Then stitch a 3/8” SA (at stitch length 3). You can carefully run another line of stitching (the same stitch length or slightly smaller) right next to the first, within the SA to reduce tension on the first stitches so they don’t show on the front when turned.
"Trim SA to ¼”, avoiding the top 1” on either of the top corners. We will need the long SA there later. Repeat Steps 1 – 4 for the other exterior side. Reach into the bag through the lining opening and look inside to make sure everything is aligned and not puckered before moving on."

Later, when you turn your bag right side out and before stitching the lining closed, you'll want to work the seams with your fingers on the outside and maybe with your hand on the inside helping to push to get a nice finished look.
For many makers, a video with explanation is helpful. SiahSwag's video sew-along of The Colette Bowler Bag is great. The gusset starts at 1:25:00. Note that Kassiah mentions cutting the actual straight bag sides with the small snips. Patricia recommends cutting the curved gusset. As a bag maker, you will find what works best for you.

Kassiah Schern Myers - The Colette Bowler Bag
Steps in a Nutshell:
- Draw the seam allowance on the gusset pieces
- Verify accurate seams on the pieces to be joined together
- Carefully clip curves in order to join the straight and curved pieces
- Align the centers of the pieces to be joined together
- Pin, clip, or staple to secure pieces together before stitching
- Baste at 1/8" and verify that sections are aligned on the outside of the bag
- Use two lines of stitching to avoid stitching showing on the outside.
- After sewing, carefully trim the seam allowance to reduce bulk
Don't rush the process. A little time spent here will avoid the time needed to unpick your stitches or ending up with a less than desired gusset finish.
Additional Tip:
For beginners ready to challenge themselves I recommend one last tip: Make up some practice pieces with scraps.
Cut out the gusset. Measure a piece that is about 2" wide and the length of the joined ovelays and bottom pieces that the gusset attaches to. Make sure the scraps are the same type of fabric that you are actually using so you can experience any challenges. Sewing a mockup of quilting cotton is not going to be sufficient unless that's what you are using for the entire bag! Practice more than once if needed, especially if having great looking gussets is important to you.
Using the steps, sew the scraps to get experience and build some "muscle memory."
This eliminates having one of your gussets on your bag being the "first time" and possibly having your second gusset look better.
You're all set! Share pictures of your beautiful gussets on our Facebook Pattern Group or email us at info@kayapapayadesign.com.

Want more articles like this? Check out the Learning Library.
Whether you are a beginner or an expert bag maker, we'd love to have you join our Facebook Pattern Group. Ask questions, give guidance and encouragement, share your makes. Patricia is always quick to answer questions, and loves your feedback.
Please feel free to comment, but be aware that Shopify doesn't offer a way for us to respond. If you have any questions, please PM through Facebook, or email us at info@kayapapayadesign.com. We'd love to hear from you!
1 comment
Thank your for the tip. I am always trying learn from others rather than my own mistakes