How To Get Great Looking Zippers - Recessed and Pockets
A badly installed zipper can really detract from the overall look of a bag. Some bag makers are hesitant to try patterns with visible zippers and feel they lack the skills or experience to do a good job. Patricia has been complimented on her zipper instructions in her patterns.
Let's look at the steps for installing a Recessed Zipper and a Zipper Pocket (shown on the exterior in the tutorial, but the same principle applies to an interior zipper pocket). You can practice these techniques on scraps of fabric. Be sure to note the tips for fine-tuning your zipper installation.
Terminology used:
SA - Seam Allowance
RS/RST - Right Side/Right Sides Together
WS/WST - Wrong Side/Wrong Sides Together
Note that a zipper foot is not required when inserting a zipper. You can use a regular zig zag presser foot and move your needle left or right as needed for the necessary seam allowance.
RECESSED ZIPPER - shown on The Cici Tote Bag
1. Fold the zipper back 90 degrees on each side and stitch to hold in place.

2. On all four zipper plackets, press under 1/2" to the WS on all short edges. Do not move your iron back and forth - firmly press to get a nice straight edge. Verify that all plackets are the same length after pressing and adjust if needed.
3. With the zipper and one zipper placket RST, line up the long edge with the edge of the zipper, with the folded placket extending 1/4" beyond the open end of the zipper. Baste the zipper edge to the placket with 1/4" SA.
TIP 1: Use clips instead of straight pins. You'll be able to keep your edges nicely aligned, and you won't get the "bump" that straight pins can cause. Also, clips are quicker to remove and won't snag on the zipper tape. This can also help in eliminating the "waviness".

4. Lay a second zipper placket RS down on top of the WS of the zipper, sandwiching the zipper between the two plackets. Be sure to line up the folded short edges for a nice finished product (these are the edges you stitched back at 90 degrees in Step 1). Stitch the basted edge with a 3/8" SA.
5. Fold back the zipper placket and press away from the zipper. Repeat steps 3 and 4 on the other side of the zipper.
TIP 2: Pressing well is an important step before top stitching. Use firm pressure and do not iron back and forth. Be cautious of the metal zipper teeth getting very hot. Allow to cool.
6. Flip both zipper plackets back and press. Take the time to make sure your pressing results in a nice even line. Moving the iron can cause distortion and a wavy line. Top stitch 1/8" all around with a stitch length of 4 mm.
TIP 3: When stitching close to the zipper teeth, stop when you approach the zipper tab with your needle down. Raise the presser foot, move the zipper tab beyond the needle where you have already stitched, and then continue. You may need to do this several times as you install a zipper in order to insure a nice even line of stitching along the zipper teeth.
By using a 4 mm stitch length, your top stitching shows nicely, it is less likely to bunch as your presser foot moves along quickly, and if you don't like it, it is easy to pick out (if you're using cotton fabric!). Remember, practice on scraps if you're not sure. Make sure to have the same thickness as the layers you will be stitching - improvise for the zipper layer with another piece of fabric or leftover zipper tape.

The Cici Tote Bag by Patricia Maxey
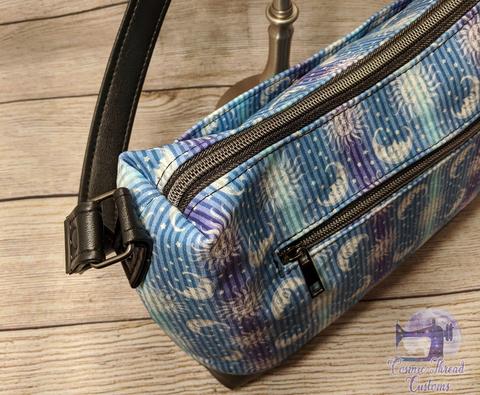
EXTERIOR ZIPPER POCKET - shown on The Claire Shoulder Bag
When installing an exterior zipper pocket, pressing the pocket facing is crucial to a great looking feature.
1. On the WS of the exterior fabric zipper pocket facing, draw a rectangle in the center of the piece. (This exact measurement will be indicated on the pattern - this is NOT a standard measurement). Use a 1/2" opening for a #5 zipper, and a 3/8" opening for a #3 (a regular zipper). The length of the rectangle will be about 1 to 1 1/2" shorter than your zipper.

2. With RST, pin the zipper pocket facing to the exterior body as indicated on the pattern for positioning.

3. Sew the zipper pocket facing and exterior body RST along the rectangle. Draw a line down the center of the rectangle, stopping 1/2" from the ends. From each corner, draw a diagonal line to the center line, creating small triangles at the end. Clip along the straight and diagonal lines, making sure to cliip close to the corners, careful not to cut through the stitching.

TIP 4: Use small, sharp pointed scissors in order to get close, neat clips without chewing into the corner or cutting the thread. This will determine how neat the front edge of the zipper pocket looks.
4. Push the zipper pocket facing through the hole to the wrong side of the exterior body. You may need to roll the fabric between your fingers around the hole edges to get them to lie flat in the corners. (Misting the fabric from a spray bottle may help it to lie flat). Be gentle and don't stretch the fabric. Press flat, making crisp straight edges. (Reference TIP 2).

5. Place the exterior zipper pocket RS up with the short sides at the top and bottom. Center and align the edge of the zipper to the short side of the exterior zipper pocket, RS up with the zipper pull to the right. Stitch in place with a 1/4" SA. Fold over and press the fabric away from the zipper. (Again, don't move your iron and distort the edge).

6. Lay the exterior zipper pocket with the zipper RS up, with the zipper pull to the left side and the pocket fabric at the bottom. Position the exterior body over the zipper and hold in place with a thin line of fabric glue or glue stick. (Do not use straight pins here as it distorts the edges). Top stitch 4 mm length around the zipper opening at 1/8". (Remember, to stop, needle down and move the zipper pull beyond the presser foot. Refer back to TIP 3).

Take your time and practice and before you know it, you'll be installing zippers like a pro and proud to show them off!

The Claire Shoulder Bag by Becca Forrette
- - - - - - - - -
To help make your exterior zipper even more attractive, try "dressing your zipper". Check out Chris Hawke's pdf in our Learning Library.
Don't have the right color zipper tape for your project? Take a coordinating fabric and apply to the zipper tape, making it truly one-of-a-kind! Thank you Chris for sharing this great idea!

Back and front of a "dressed" zipper

The Claire Shoulder Bag by Chris Hawke - note the "dressed" zipper
Are you a visual learner? Siah Swag's YouTube channel has sew-along videos for the majority of our patterns. She'll walk you through zipper installation step-by-step. Check out the list of video sew-alongs.
Do you want to test your new zipper skills on The Claire Shoulder Bag featured in this tutorial? Check out the pattern and the sew-along video.

- - - - - - - - - - -
We've been building our Learning Library. There's over one dozen articles and tutorials.
Whether you are a beginner or an expert bag maker, we'd love to have you join our Facebook Pattern Group. Ask questions, give guidance and encouragement, share your makes. Patricia is always quick to answer questions, and loves your feedback.
Please feel free to comment, but be aware that Shopify doesn't offer a way for us to respond. If you have any questions, please PM through Facebook, or email us at info@kayapapayadesign.com. We'd love to hear from you!