Your Bag Making Tool Kit - At the Sewing Machine: Part One
If you've been sewing for awhile, you probably have accumulated a good amount of sewing tools. Bagmakers know having particular tools on hand will make manipulating fabric into a gorgeous bag creation an easier process with better results.
Most of the tools and notions we will be covering are easily found at a fabric or mega store. All should be easily sourced online as well. I have provided some links for your convenience. Kaya Papaya Design is not affiliated with any of these.
Let's start with making sure your sewing machine has the right tools:
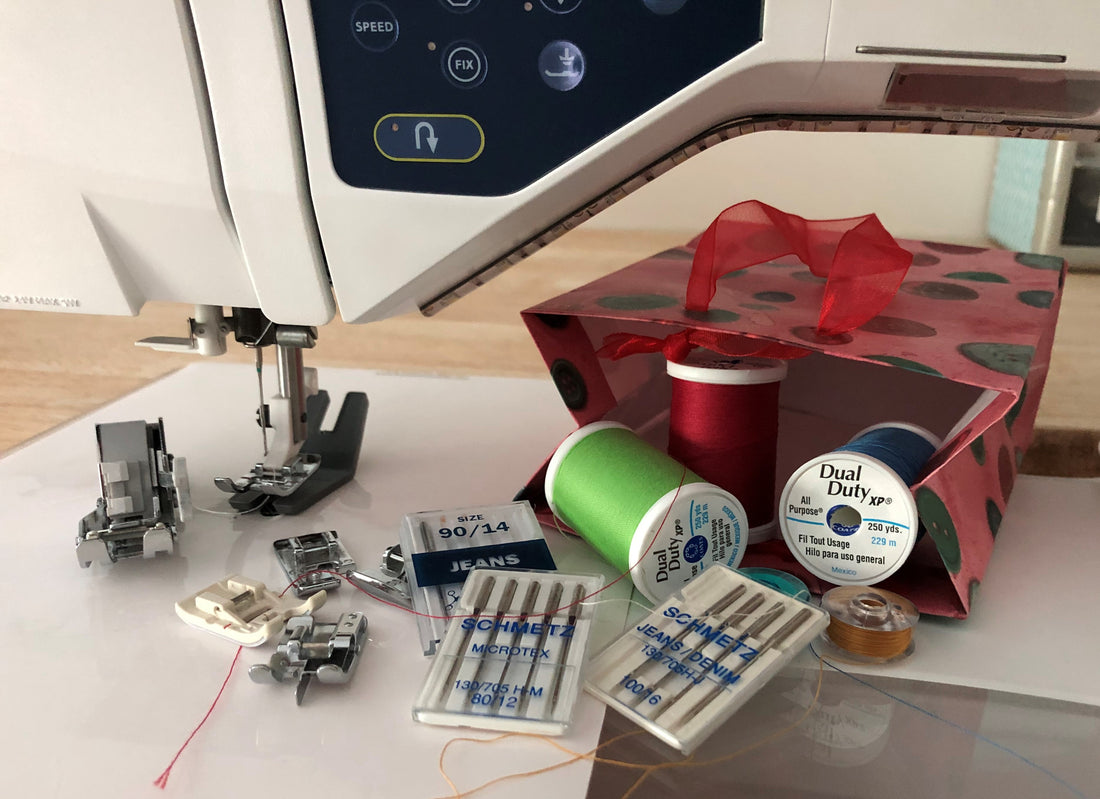
THREAD:
When I was learning to sew by candlelight (haha), we basically just used any thread, as long as it matched. I don't remember looking at the actual content of thread. Nowadays, we have more thread options and I personally am more aware of the content of the thread and fabric choices and making sure they are compatible.

Hector J Rivas photo
Your handbag is going to get a lot of use, so a polyester thread is preferable to cotton. A 40 wt thread will stand up to a lot and can be used for both construction and topstitching. However, a thicker topstitch thread will bring the deserved attention to your painstaking topstitching detail.

Beautiful topstitching by Beth Silva-Henderson
Knowing which thread to use can be confusing as it may be labeled by weight, Tex, or denier. Wawak has a thread reference chart. For Tex, the higher the number, the thicker the thread. Industrial machines can easily handle a Tex 60 or 90, while a domestic machine may only be able to handle a Tex 40.
Note that the 40 wt thread mentioned for construction, is equivalent to a Tex 25. Be sure to read the markings on the thread spool or in the description before purchasing.

On a domestic machine, when using a topstitching thread you may need to use a matching polyester thread in the bobbin. This may not give you the effect you want when stitching a strap. However, a thicker thread means tension adjustments and you may not want to adjust the tension in your bobbin.
Note that you should always reference your sewing machine's manual for thread choices and the appropriate needle to use. You may need to adjust your machine's top tension for thicker threads. Practice on scraps with the appropriate layers before sewing on your project.
Needles:
As in all sewing projects, using a new properly-sized needle will give you the best results. You're going to be stitching a lot of layers of fabric, interfacing and stabilizers, so your needle needs to be up to the job!
A denim 90/14 or 100/16 needle has a ball point and is excellent on wovens, canvas and cottons. It would also work well on cork.

A leather 100/16 needle has a wedge shaped point that penetrates heavy fabrics and layers without tearing. It is best used on non-woven fabrics such as leather, vinyl, and cork.

You may prefer to change to a topstitch needle when topstitching. It has an extra large eye for the thicker thread, and is super sharp to penetrate multiple layers. The thread should only take up 40% of the needle's eye. This will prevent bent or broken needles and broken thread.


Always test the needle on a practice layer of your fabrics and interfacings. You do not want to use a needle that will make large holes around your thread. Additionally, if you have to remove stitching, those holes will be very evident.
With the increased use of WPC (water proof canvas), we have found for best results to use a 90/14 microtex needle. The sharp point easily goes through layers, which helps move the fabric under the presser foot without the necessity of a walking foot. This is a bonus since the somewhat sticky back of the WPC wants to cling to the throat plate.
Machine Feet:
A Walking Foot is the best for moving all those layers along. Additionally, some fabrics and interfacing/stabilizers want to cling to your throat plate and the walking foot will make sure they glide through without you pushing or pulling, causing distorted stitches. If your machine didn't come with a walking foot, you can purchase one for your particular model or a generic brand depending on your shank.
For topstitching, an Edge Stitch Foot has a blade to align with the edge of your fabric. This foot is also referred to as a Blind-hem Foot or an Edge-Joining Foot. It has a wide needle opening, allowing for needle positioning. It will guide your fabric along the edge of the foot and is perfect for sewing straps.

For inserting zippers, both a Zipper Foot and a Binding Foot are useful, though not necessary to get the job done.
If you are stitching leather or heavy vinyl, a Non-stick or Teflon Foot can be helpful, particularly when used with a Teflon or Queen Supreme Mat.
Of all the feet listed above, if you are going to be making many bags it is worth investing in a Walking Foot. I have personally shopped at Sewing Parts Online and have found their pricing, shipping, and customer service excellent.

Hump Jumper:
A Walking Foot is going to move all of those layers through, but sometimes you get to a seam intersection that is going to need a little help. The quick and dirty method is to take a small scrap of vinyl or other fabric folded several times and place behind the presser foot, giving it extra lift off the fabric.
The little tool that does that for you and can be moved to adjust for different thicknesses is a Hump Jumper. One of the cheapest tools to purchase for your toolbox, but certainly a sanity saver when you need it. Your needle will thank you!

Lighting:
Bag making involves a lot of detail work as with topstitching, adding trim, and making things look just right. Aside from the finishing steam pressing, getting your stitching just right is going to distinguish your bag from a simple homemade item. You need to be able to see what you're doing!
Lighting is a feature that I think all sewing machine manufacturers could improve on installing. Why are we not seeing LED lights integrated into their designs? I added these to my machine, and I can actually sew with just these and my machine light and not need any additional lighting. This is wonderful when your eyes are tired from the brighter overhead lights.
The sewing machine repair technician I questioned about adding the LED lights and the removal for machine repair told me the following: if the machine housing meets in the middle with a visible line, then just position the light strip to one side or the other. My housing "crack" is toward the back, so no issue with adding them to the middle. Stand lighting can get expensive, but these LED lights are totally affordable, easy to install, and a game changer in viewing your work, especially for night sewing.

Sewing Land has a review of the LED lights along with 6 others for 2022. I can't address stand type or other lights as I have a simple swing arm regular lamp over my machine, a bright room with natural light from two windows, and then my wonderful little LED lights. Your sewing situation may need additional lighting. Your eyes will thank you, and your work will be better for it.
Having the proper tools for sewing bags makes the process so much more enjoyable, efficient, and rewarding!
Now that you've got your machine set up for optimum sewing, let's move on to prepping your bag.
Next up for Your Bag Making Tool Kit - Measuring, Marking, and Cutting Tools: Part Two.
- - - - - - - - -
4 comments
This is so helpful, thank you!!! Looking for a part 2 next
I would like to add that regarding needles, the use of a topstitching needle may also be important because the eye is longer that regular needles (closer to the tip) which allows for adequate penetration so you won’t get skipped stitches!! It’s often an unknown aspect of this wonderful needle, but will turn a project from a headache into a success!
I see all the time on Facebook bag making groups that a lot of bag makers are using Glide thread, which is meant for machine embroidery and quilting. They claim it works fine for making bags, but I am not convinced that is a good thread to use, since no information about the thread even suggests using it to sew with (bags, clothing , etc.) Perhaps it would be okay for topstitching or lightweight bags that you wouldn’t carry a lot of weight in. So what brands, Tex, weight threads are best for making bags? I don’t want a customer’s bag to fall apart if I were to use the wrong thread.