Tips for Working With Vinyl and Faux Leather
Patricia prefers a high-end designer look when designing patterns. Vinyl and faux leather have been her go-to materials. She has yet to make a bag out of leather, and really finds no reason to do so. The practicality and price of vinyl and faux leather are appealing and cost effective. (Cork has the same appeal and I've covered it in this post.)

The Fallyn Bag in a beautiful combo of 3 vinyl fabrics
Faux leather consists of a plastic over a cotton or polyester base. Though faux leather is considered "vegan" as no animal products are used, there are now true "vegan" products on the market using vegetable oils in place of much of the plastic, making it more environmentally friendly. Generally, you will see vinyl, faux leather and vegan leather terminology used interchangeably.
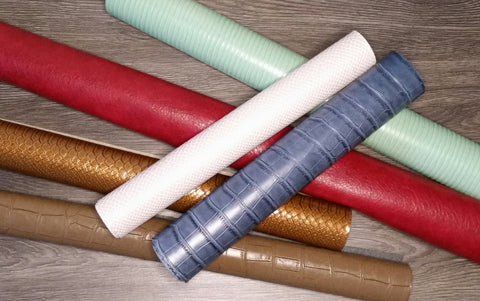
Like leather, there are different thicknesses (gauges) of vinyl/faux leather depending on the quality and base material. The higher the gauge number, the thicker the vinyl. Check out the tips below for success with these two fabrics.
CHOOSING FABRIC AND INTERFACING
When choosing your fabric, pay attention to the quality, particularly the backing. A thick backing may be hard to sew on a home machine. Some thinner vinyl may have a slight stretch to it and interfacing with SF101 or a similar woven helps stabilize and prevent stretching. But in general, stabilizer or interfacing will not be necessary with faux leather. Note that a product with a "fuzzy" backing can cause issues if you need to remove stitching, as the fuzzy backing may poke through the needle holes. A "sticky" feeling vinyl, like glitter vinyl, may give you trouble with stitching. Store your fabric rolled, not folded.
CUTTING, MARKING AND PRESSING
When cutting out a pattern, lay the vinyl face down and trace the pattern on the back. No need to worry about a "grain" as there generally isn't one. If possible, make all markings on the back or within the seam allowance. If you need to mark on a visible area, use a chalk marker. However, if you have a fabric with a design that you want to highlight or "fussy cut", you may need to mark from the front. Customer Kathy Mills-Shadduck did an excellent job centering her vinyl on The Alyssa Hip Bag.

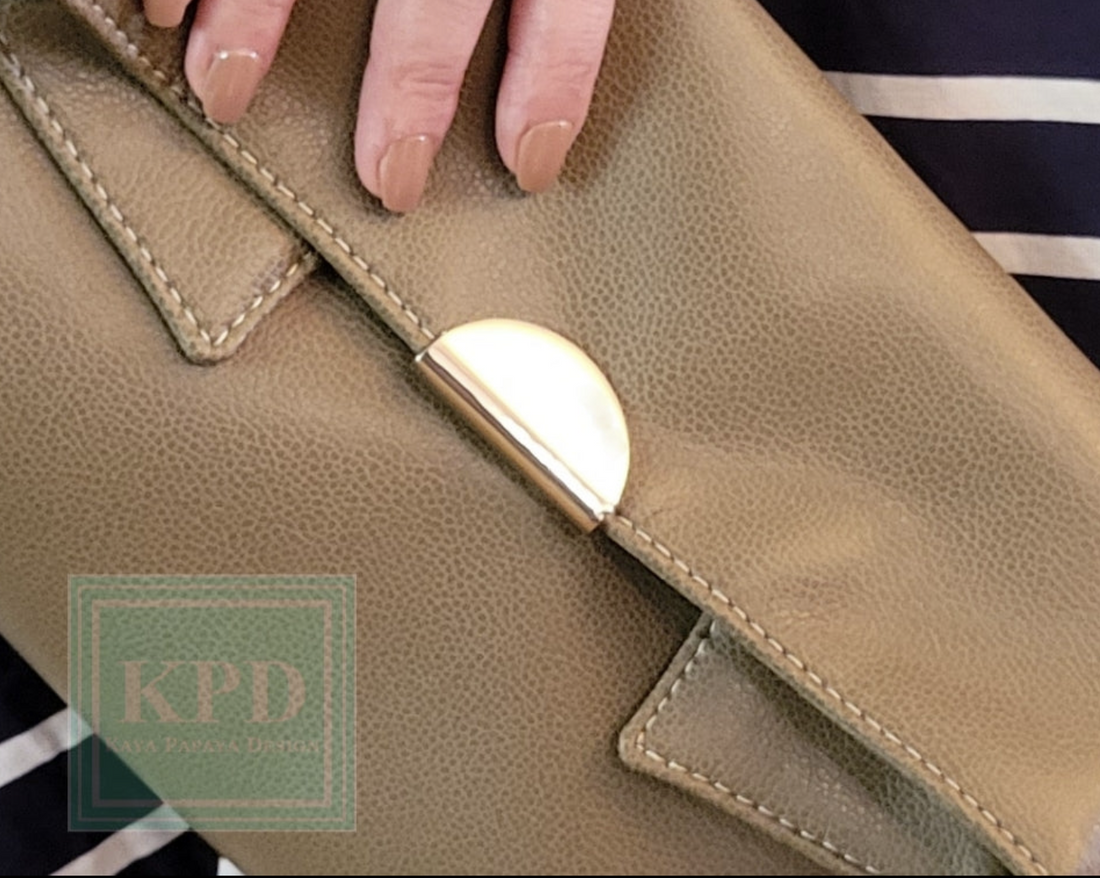
Cut out your pattern using a rotary cutter, a gridded quilting ruler, and a gridded cutting mat. This will make nice crisp edges. Extra sharp scissors will give you the best result on areas that need trimming, such as curves. Some patterns, such as The Karys Shoulder Bag with the overlay corners, may have exposed edges and you want them to have a nice smooth appearance.
Use a product such as Edge Kote on exposed edges after cutting and allow it to dry before assembling your bag. It is available in six colors and neutral. Though considered pricey, a bottle will last a really long time.

Should you need to press your vinyl for any reason, be sure to do so from the back and use a press cloth. Do not use steam!! Spritzing the press cloth can be helpful, too, when you're needing to work out creases. Your success will depend on the vinyl and the thickness of the backing. Be sure to let it cool thoroughly before cutting out, especially if you had to add interfacing. Do not use a clothes steamer on vinyl!
AT THE SEWING MACHINE
Wonder Clips are the best method for securing layers together. Should you need to pin where clips aren't possible, make sure to pin within the seam allowance to avoid holes showing on the exterior of your bag. Another great product to use are slide-in or pin curl hair clips.


A new 90/14 or 100/16 universal or jeans/denim needle is best. Have a spare ready as faux leather will dull your needle more quickly than fabric. It is best to avoid a leather needle, as it may leave big holes. This may show around your thread, and will also be very noticeable if you have to remove stitching for any reason.
Use polyester thread as it tends to be stronger than cotton thread. You may want to have a thicker thread for top-stitching. Use a stitch length of 3.5 mm for seams and 4 to 4.5 mm for top-stitching. Patricia stitched this Penelope Crossbody on a domestic machine.
A walking foot really makes stitching vinyl much easier. But if you are just wanting to try out working with vinyl and don't have a walking foot, these suggestions may work:
- A Teflon foot along with a Teflon mat.
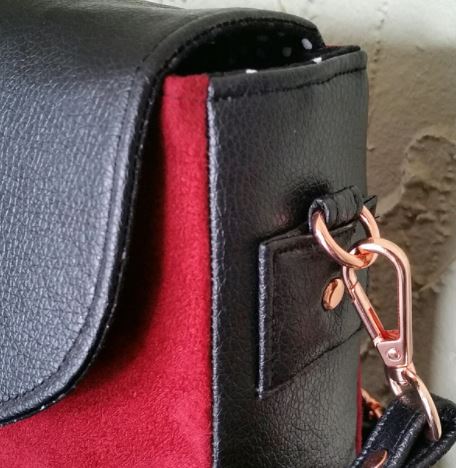
- Tissue paper, parchment paper, wax paper or even just a piece of scratch paper over the right side of the fabric to keep it from sticking to the presser foot or the presser plate, depending on which way you have laid the fabric. On The Janie Pouch in the picture below, the top line of top-stitching next to the zipper was done with a walking foot. The bottom row of top-stitching was not - I forgot to put it on. The stitch length is the same, but the presser foot was dragging on the vinyl making the stitches closer together.

The Janie Pouch is an excellent first pattern for sewing vinyl - just enough to learn the ropes.
PRACTICE ON SCRAPS
As with all techniques we teach on Kaya Papaya Design, practice, practice, practice. Practicing will help you get better results on your project:
- Removing stitches will leave holes. Also, repeated stitching over the same area such as back stitching will perforate the vinyl and may cause the vinyl to tear. Remove some stitches and do some back stitching and you'll understand!
- When top-stitching, instead of using a back stitch to secure ends, leave long tails and tie off on the wrong side of the fabric.
- While you are practicing, you may notice that you will have to adjust your tension, depending on your machine's capabilities and settings. Be sure to make note of this before starting your project. You don't want the stitching discrepancy as shown on The Janie Pouch.
- Be sure to practice on the same thickness you will be stitching, particularly the multiple layers usually involved when you are top-stitching. A Hump Jumper (TM) can be very handy in getting the presser foot over multiple layers, particularly if you don't have a walking foot. Sometimes a Hump Jumper needs to be used with a walking foot.
- No Hump Jumper? A scrap piece of fabric or vinyl folded to multiple layers and placed under the back of the presser foot is just as helpful!

HELPFUL PRODUCTS
Two products that are particularly helpful when sewing faux leather are Double- Sided Tape (DST) and Fabri-Tac or other fabric glue. DST is great for holding folds in place since you can't press with an iron, but be warned that it can gum up your needle. It comes in a variety of seam widths from 1/8" to 1/2". It may be worth your while to find a DST that is more machine friendly. Fabric glue is easier, but it does need to be allowed to dry.
If you follow these tips, practice, and take your time, you can master sewing on vinyl or faux leather. In addition to The Janie Pouch, The Cici Too Cosmetic Bag and The Taco Tuesday are great beginner projects for working with vinyl.

- - - - - - - - - - -
2 comments
Hello there. Could you please tell me where you sourced the dark red vinyl pictured in the clutch above where you mentioned you forgot to put on your walking foot on the bottom row of top stitching? Thanks so much!
Great tutorial learned much need information as I am a new bee 🐝 at age 79. From quilting to bag making. 👌