How To Sew Great Slip Pockets - And Get The Details Right
For some bag makers, you can just never have too many pockets. The Alyssa Hip Bag - a favorite among KPD bag makers - has LOTS of pockets, and the updated Cici Tote Bag has lots of options for pockets. The Laila Weekender and The Claire Shoulder Bag also feature multiple pockets that not only add so much storage, but also offer opportunities to enhance the bag design with unique well-made finishes. The bag with the most - and biggest - pockets is our Sunset Beach Tote.

Leslie Anthony's Fallyn Bag includes a slip pocket with rivets and trim, and a zipper/slip pocket combination
Slip pockets are easy and we tend to rush through sewing them. However, taking the time to "finesse" your pocket using the tips below will give your bag the "handmade" attention-to-detail look.

The Claire Shoulder Bag has an exterior slip pocket sewn into the side seams and the bottom overlay - by Patricia Maxey
Terminology used:
SA - Seam Allowance
RS/RST - Right Side/Right Sides Together
WS/WST - Wrong Side/Wrong Sides Together
BASIC SLIP POCKET
A slip pocket is for "slipping" something into. This is the most basic and handy pocket you can make. This pocket can be constructed with one or two pattern pieces, depending on where it will be used.

The Colette Bowler Bag exterior slip pocket by Siah Swag Bags
1. In The Cici Too Cosmetic Bag, the pocket is small and intended for something lightweight, such as lipstick or eye makeup. In many small to medium handbags, the intended pocket use is the same in that there won't be a lot of weight in the pocket.

The Cici Too Cosmetic Bag by Sew Special by ZM
The pocket pattern is cut as one piece, twice the height of the intended finished pocket, interfaced with a fusible lightweight woven. This is folded in half, with the RST and stitched along the sides and from the corners on the bottom, leaving an opening for turning the pocket out. Backstitching at each opening end prevents unraveling when turning and pressing.

If the pocket will be used for heavier items, such as in a tote bag, the pocket may be cut as two pattern pieces and sewn together. By having the top edge seamed, it gives more structure to the pocket and is less likely to sag with heavy items. The Cici Tote Bag slip pocket is made this way. All sides are stitched with an opening still at the bottom, again backstitching at the open edges.

2. Trim the SA to ¼'' and clip corners at a diagonal.
TIP 1: Be sure to not clip too closely at the corners. Use the width of your scissor blade as a measurement of distance from the corner. If you clip into the stitching, re-stitch. Though you will be top-stitching the pocket, a clipped corner will become a frayed corner. Before trimming the seams, press the stitches into the fabric and turn back the seam allowance and press the edge. This will help insure a nice flat edge when you sew the opening closed.
3.Turn the pocket RS out and push out the corners with a chopstick. Press. Top-stitch across the top edge of the slip pocket at ¼‘’. The opening will be at the bottom.
TIP 2: When using the chopstick, roll it in the corner rather than jabbing. Also, take the time to roll the seams with your fingers as you are pressing, particularly at the bottom. The bottom open seam can tend to bow up in a curve slightly as there isn't any stitching holding it down. Make sure to line up the seam allowance that you folded back at the opening. This is particularly important if your slip pocket is on the outside of your bag. You want a crisp, straight edge. When top-stitching, set your stitch length to 3.5 to 4 mm. Also, setting the needle in your fabric a little in from the edge and then backstitching helps to keep from chewing the edge of the fabric.

4. Center the slip pocket on the lining or exterior fabric as indicated on the pattern and pin in place. Backstitching at the beginning and end, top-stitch around the sides and bottom of the pocket at 1/8”, closing the opening.

TIP 3: Be sure to follow the measurements on the pattern for placement, but also take the time to visually insure that your pocket placement looks correct. Make sure it is not going to fall within a seam allowance area, unless specified in the pattern.
When top-stitching, if the pocket is large or you just want to strengthen it, do a diagonal couple of stitches at each upper corner, or bar tack the corners.
Here are some variations on the basic slip pocket:
CARD SLOTS
The Alyssa Hip Bag has multiple card slots. A pattern should have detailed instructions for the card slots required for the design. But in their simplest form, they are a big slip pocket folded to make the slots.

The Alyssa Hip Bag by Josette Skilling with added corner rivets
EXTERIOR SLIP POCKET
On The Claire Shoulder Bag, the exterior slip pocket is sewn a little differently. The pocket was folded WST, pressed and the top edge top-stitched. It was then aligned with the exterior fabric and basted in place. The raw pocket edges will be enclosed in the side seams.

PLEATED SLIP POCKET
A pleated slip pocket has extra fabric added to the dimensions in order for a pleat or dart to be added to make the pocket full, rather than flat. This pocket may be used for glasses, or something else bulky, even a cell phone, depending on the depth of the pleat.

Pleated front pocket on The Alyssa Hip Bag by TwoLeos Design
The Claire Shoulder Bag has a divided slip pocket, made into two pleated pockets. This pocket was folded RST, stitched along the sides and bottom, leaving the top open. Vinyl trim that matched the exterior was folded over the top and stitched.
1. Position the pocket per the pattern instructions. Two lines of stitching were done for dividing the pockets. Two lines for a pleated pocket adds stability for the pocket contents. Remember: Take your time, and backstitch at the beginning and end.

2. The positioning of the pocket causes it to bow out for the fullness for the pockets' functions. At this point, only the sides are sewn to the lining. Two lines of top-stitching at 1/8" and 1/4" were done for strengthening.

3. Tucks or pleats of 3/8" depth were made at each stitched side and middle, making two pleats per pocket. They were pressed up to but not including the vinyl, and pinned in place, and top-stitched across the bottom edge at 1/8".

GATHERED SLIP POCKET
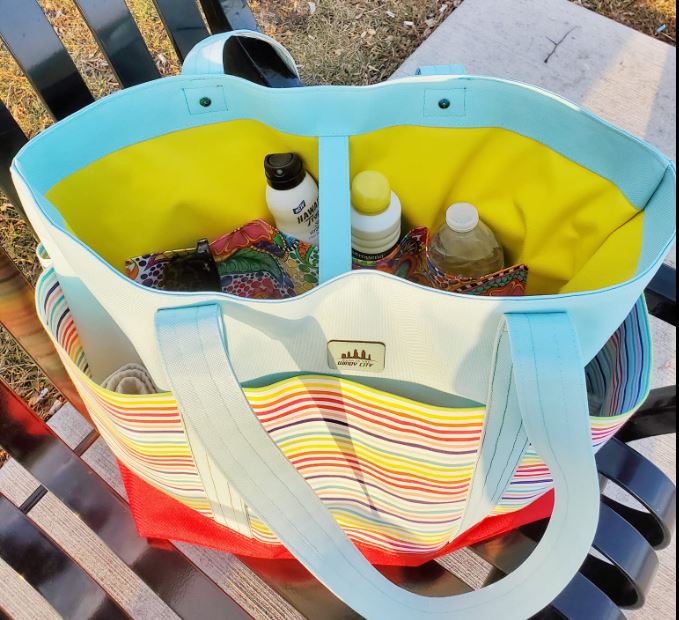
Like the pleated pocket, the gathered pocket also has extra fabric added to its dimensions for fullness. This type of pocket is great for a water bottle, baby bottle, coffee thermos or even shoes when used inside a duffel. For strength and durability, this pocket is usually sewn into a side seam of the bag.
This slip pocket is made much like the exterior slip pocket shown at the beginning on The Claire Shoulder Bag. The pocket is folded WST and pressed. The upper edge is top-stitched below the top edge a distance (maybe 1/2") to allow a piece of elastic to be inserted. The edges of the pocket are then basted to the edges of the pattern piece it is being attached to. The gathered pocket shown here is in a side seam.

Interior elasticized pocket on The Laila Weekender
Dress Up Your Pockets
Trim, hardware, and decorative stitching will give your bag that "handmade" high end look.

Zeïba Monod added cork trim and a snap to The Claire Shoulder Bag

Chris Hawke added decorative coordinating snaps and trim

On The Claire Shoulder Bag, pocket trim and a decorative rivet
Pockets are an important aspect of a bag. A bag that you will actually use depends on whether there are functional, well-thought out pockets. The Alyssa Hip Bag, as small as it is, has 3 slip pockets and 4 card slots, in addition to other pockets.
Slip pockets are easy to practice on scraps to get your turning skills and top-stitching techniques down pat. And if you want to add decorative stitching in place of the top-stitching, be sure to practice that on scraps. Decorative stitching can really add a bespoke look to your bag, especially if used on the outside, but what a nice surprise on the interior, too.

The Colette Bowler Bag with machine embroidery by Cosmic Thread Customs

Do you have any tricks to making superb slip pockets? Curious why I didn't include zipper pockets? Then check out the blog post: Taking the Intimidation Out of Zippers. Want more articles like this? Check out the Learning Library.
Whether you're a beginner or an experienced bag maker, we'd love to have you join our Facebook Pattern Group. Ask questions, give guidance and encouragement, share your makes. Patricia is always quick to answer questions, and loves your feedback.
Please feel free to comment, but be aware that Shopify doesn't offer a way for us to respond. If you have any questions, please PM through Facebook, or email us at kayapapayadesign@gmail.com. We'd love to hear from you!